Recently added to HAR”s free products and services is the zipLogix electronic signature tool called Digital Ink. This product is free to MLS and CIE subscribers. The consumer FAQs and step by step guide are below. Feel free to pass them along to your clients during the transaction process to help utilize this great new tool. Feel free to download the how to guide below.
Consumer FAQ’s on Digital Signatures
What is a Digital Signature?
A Digital Signature provides individuals with the ability to sign legally binding forms with speed, accuracy and security without traditional paper and ink-based signatures.
How are documents received?
Recipients receive an email with a secure website link directing them to their documents for digital signature.
How is my name created for me to sign my documents?
You will be provided with name style to choose from and you will create a sign in PIN for future access to your account.
What is a PIN and what do I need it for?
A sign in PIN is like a password to get into your documents. This process keeps your documents secure for each time you open the same documents.
How will I know where to sign?
Indicators are provided throughout each document for each recipient to select to sign.
If there are more than one to sign, how will the system take care of this?
Documents will be sent in the order that they are to be signed and automatically forwarded to the next signer.
Can I have copies of my signed documents?
Yes, even before they are completed, you can print, view and download your documents.
Signing Legal Documents with Digital Signatures
Consumer How To’s
What is a Digital Signature?
A digital signature is an electronic rather than a written signature that can be used to sign documents sent by a secure email link. It ensures the authenticity of a document or contract and gives the sender and recipient confidence that the message was not altered in transit.
Step 1 – Get Started
Receiving your first set of legal documents for digital signature from your REALTOR®
- You will receive an email from your REALTOR®. The subject of the email will be:
zipLogix Digital Ink Online Signatures
Please check your Spam folder to ensure that you have not missed it. Contact your REALTOR® if you do not receive your documents in a reasonable amount of time.
- Select the link to access your documents. This will open your default internet browser.
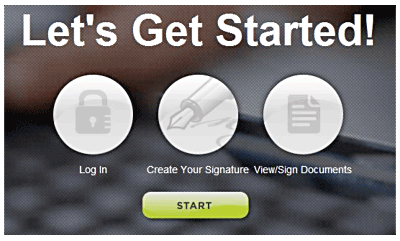
- Select the Start button!
Step 2 – E-Sign Legal Consent
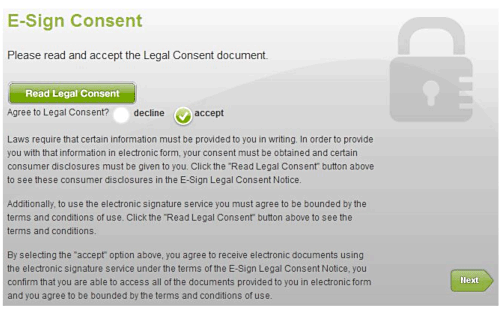
- E-Sign Legal Consent – Read and accept the E-Sign consent and then click Next
Step 3 – Create Your Signature
- Create Your Signature – Enter a private sign-in personal identification number (PIN) and choose a style for your signature and initials. Your PIN will serve as your electronic signature. You will use it to access your transaction again in the future so make sure to keep it secure. You’ll need it again! Select the On to View/Signbutton.*** IMPORTANT NOTE ABOUT INITIALS ****
When adding your initials, you will see your signature throughout the signing process, not your initials. Upon completion, initials will be visible.
Step 4 – View/Sign Documents
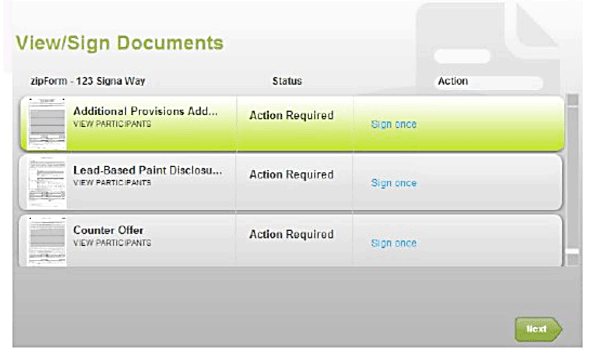
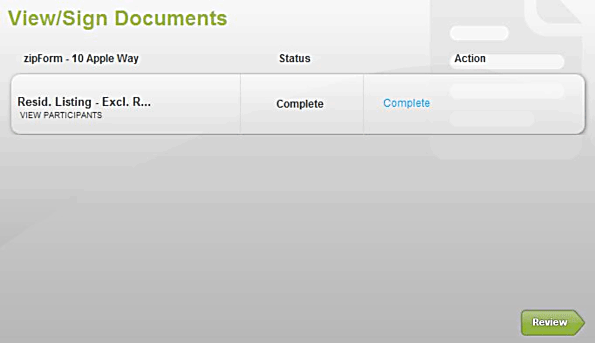
- Your REALTOR® has prepared documents for you to digitally sign and attached them to this email. The name, status and action required are displayed in the View/Sign Documents window. You will be able to anticipate how many times you will have to sign and initial each document from this window. The first document will be selected.
- Click Next to continue to the signing page.
Step 5 – Click to Sign
- Use your TAB key on your keyboard to move through your document to sign and initial each field.
- Let’s take a look at the toolbar at the top of your document:
- This is the name your document and the date is was created
- These are the page numbers of your document. You can select any page number to navigate to that page
- This is a quick reminder to you that you can use the Tab key to navigate to the next signature or initials section of your document
- This is a display of the amount of times you will need to digitally sign or initial your document
- This is your scroll bar
- Remove all Signatures clears all signatures from your document
- Commit Signatures finalizes the signing process of your current document
 ** Refer to “The Sidebar” for additional references **
Step 6 – Save all signatures
- When you have reviewed the signatures and initials, click the green Commit Signatures button.
Step 7 – Intent to Sign
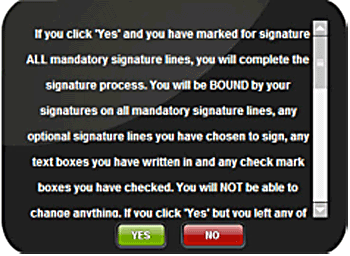
- Click Yes to agree to the legal terms of digital signatures, finalizing your signatures and initials on your documents
Step 8 – Continue Signing
- After signing a document, you are brought back to the View/Sign documents page. Follow steps 4 – 7 to complete signing all contracts for this state of the transaction.
Step 9 – Signing is Complete!
- When you have completed signing all documents, the Next button will change to read Review. You can view, save and print your documents.
Look for Your Thank You Email from zipLogix
- You will receive a Thank You Email from zipLogix with your website link to access your completed documents. Use your PIN to review, print or save them.

